




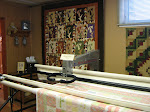

 Who knew you could quilt a quilt on the longarm using muslin instead of batting!!! As per my clients very adamant request, I reluctantly tried it and without too much difficulty I managed to quilt the beast. I say beast because this quilt was made out of flannel, top and bottom and was 116in square and weighed a darn ton. I had to get DH to come down to the studio and help me fold it when I'd finished. I can't imagine what it would have weighed had I quilted it with batting instead. For the quilting, I did a freehand loose meander all over and outlined each appliqued heart with a squiggly line. I hope the client likes it and appreciates how much I fretted over her quilt. I'm hoping this was the first and the last time for a muslin middle as it was difficult to try to work in any fullness with no batting to soak it up in.
Monday, February 16, 2009
Who knew??
Who knew you could quilt a quilt on the longarm using muslin instead of batting!!! As per my clients very adamant request, I reluctantly tried it and without too much difficulty I managed to quilt the beast. I say beast because this quilt was made out of flannel, top and bottom and was 116in square and weighed a darn ton. I had to get DH to come down to the studio and help me fold it when I'd finished. I can't imagine what it would have weighed had I quilted it with batting instead. For the quilting, I did a freehand loose meander all over and outlined each appliqued heart with a squiggly line. I hope the client likes it and appreciates how much I fretted over her quilt. I'm hoping this was the first and the last time for a muslin middle as it was difficult to try to work in any fullness with no batting to soak it up in.
KLUNK!!!!!!!
 My very first broken needle!! I couldn't believe the sound that it made when it broke! I nearly shot through the roof, I was so scared! :O I was quilting a customer quilt, flannel pieced and some of the seams intersections were all pressed to one side and there was a mountain of fabric under there. I'm actually surprised now that I think about it that I didn't break more than one needle on that quilt. First things first, I checked the quilt and as my luck would have it...no hole, I then went over my baby (Miss Millie), put in a new needle and checked all her parts and to my surprise she was good also!!! I was able to continue quilting, and get it completed for my deadline...phew!!!
Tuesday, February 3, 2009
Foundation by the Yard...part 2
 Alright so here's the scoop... The quilt in the previous post is made using "Foundation by the Yard". Same idea as "Foundation Piecing" or "Paper Piecing" except the foundation by the yard is printed on a heavy muslin fabric and is left in the quilt instead of torn off like the paper versions.
 The panel is cut up into the individual blocks and borders, which are sewn using the same techniques as foundation piecing. Sounds great...right???
 Hmmm...not so much!! Why, you might ask??? Well, the best way I can describe it is to compare it with a printed panel. Great idea if you leave the panel and quilt it as is but try and cut the panel apart and sew together using your own design and you soon find out that the panel fabric is not square nor printed square. That's enough to drive a quilter crazy!
So after you get all your blocks pieced and your border strips pieced and go to put it together, you soon find out that each block is not perfectly square, and to set it together with another one, the printed lines don't match up. You can't even square up the blocks on your own as some are made completely wonky and you'll cut off or sew off your points. I tell you this thing drove me nuts and if I hadn't been commissioned by the LQS to make it, I would have pitched this thing in the garbage long ago! So, if your thinking Foundation by the Yard sounds like a great idea....DON'T DO IT!!!!!

Saturday, January 31, 2009
Foundation by the Yard...
 I finished this quilt about two weeks ago and just haven't had time to blog about it! Busy with hockey, hockey and more hockey! I will be back soon to tell you more about this quilt...there is a story!
Saturday, January 3, 2009
2009 Challenge
 At the beginning of January I decided to join the many quilters taking the 2009 Challenge completing one project a month. That's 12 finished quilts in the next 12 months!!! I can do it! And the crazy part is it won't cost me a thing as I have more than enough projects waiting for my undivided attention. If your interested pop on over to May Britt's Blog at http://abyquilt.blogspot.com/ and join the wave!!! Thanks for the challenge ladies...I can't wait to get quilting!! (I couldn't get the link to work properly so if anyone can help me...)
Sunday, December 21, 2008
Timberline Complete!!!
 Now this quilt defines the meaning, labor of love!! It was so worth it...the quilt is absolutely stunning in person. At first I thought who in their right mind would want to make this one into a queen...it would take ages! Well, this is why, it's gorgeous!! I made the wall hanging which measures 48"x48". Now how about that border...told you it was a show stopper.
 The pattern was very well written and it is meant to test and challenge your perfect scant 1/4" seam. I was super surprised when I only had to trim wee slivers off of my blocks and even when I got all my blocks sewn together and layed out my borders...they fit like a glove!!! Even with all those seams!
 Now not every seam lined up to perfection, but after the amount of time I spent unsewing sections of this quilt it was time to let a few slip by. Now I know, tisk..tisk, I still have lots of room for improvement! :)
 Did I mention seams!!!!! Look at them all!!! I can't believe I'm actually showing you the backside of my quilt top...I feel like there should be horror music playing in the background!!! hahahaha!!! Well, I hope you enjoyed this journey with me, and if your thinking about trying one of Judy Martin's patterns...just do it, you'll love the results!! My biggest tip would be to make a practice block before you begin, you will learn how to perfect your scant 1/4" seam before you begin and you will be glad you did!
Tuesday, December 9, 2008
Workshop Bag...

I started this bag last spring and have finally got around to finishing it or at least almost finishing it! I still have to put the handles on but couldn't wait to post it. This bag is the perfect size for taking all of your supplies including your 17x23" cutting matt, all your rulers and fixins that you need for your workshop. Just throw it over your shoulder and go...
Subscribe to:
Posts (Atom)
